分享-OpenWrt 双 wan 出口实现负载均衡和带宽叠加(每个链接单独出口)
情况说明
当你的网络运营商(公司IT,楼宇等)针对单独一个 IP 或设备限制了流量,比如 5MB 带宽,你可以通过以下方法实现同时使用两个外网出口(有线网络+Wi-Fi),这样总的带宽就有 5MB+5MB=10MB。但是,单个链接,还是只能有 5MB 限制。
OpenWrt 安装
opkg update
opkg install mwan3 luci-app-mwan3
网络链接
有线网络
Gateway Metri: 10
- Network > Interfaces
- WAN > Edit
- Advanced Settings
- Use default gateway: enabled
- Use gateway metric: 10
- Save & Apply
无线网络
Gateway Metri: 20
- Network > Interfaces
- WWAN > Edit
- Advanced Settings
- Use default gateway: enabled
- Use gateway metric: 20
- Save & Apply
mwan3(Multi WAN load balancing/failover) 配置
通过 UI 配置比较简单一些,进入 OpenWrt UI,Network -> MultiWAN Manager
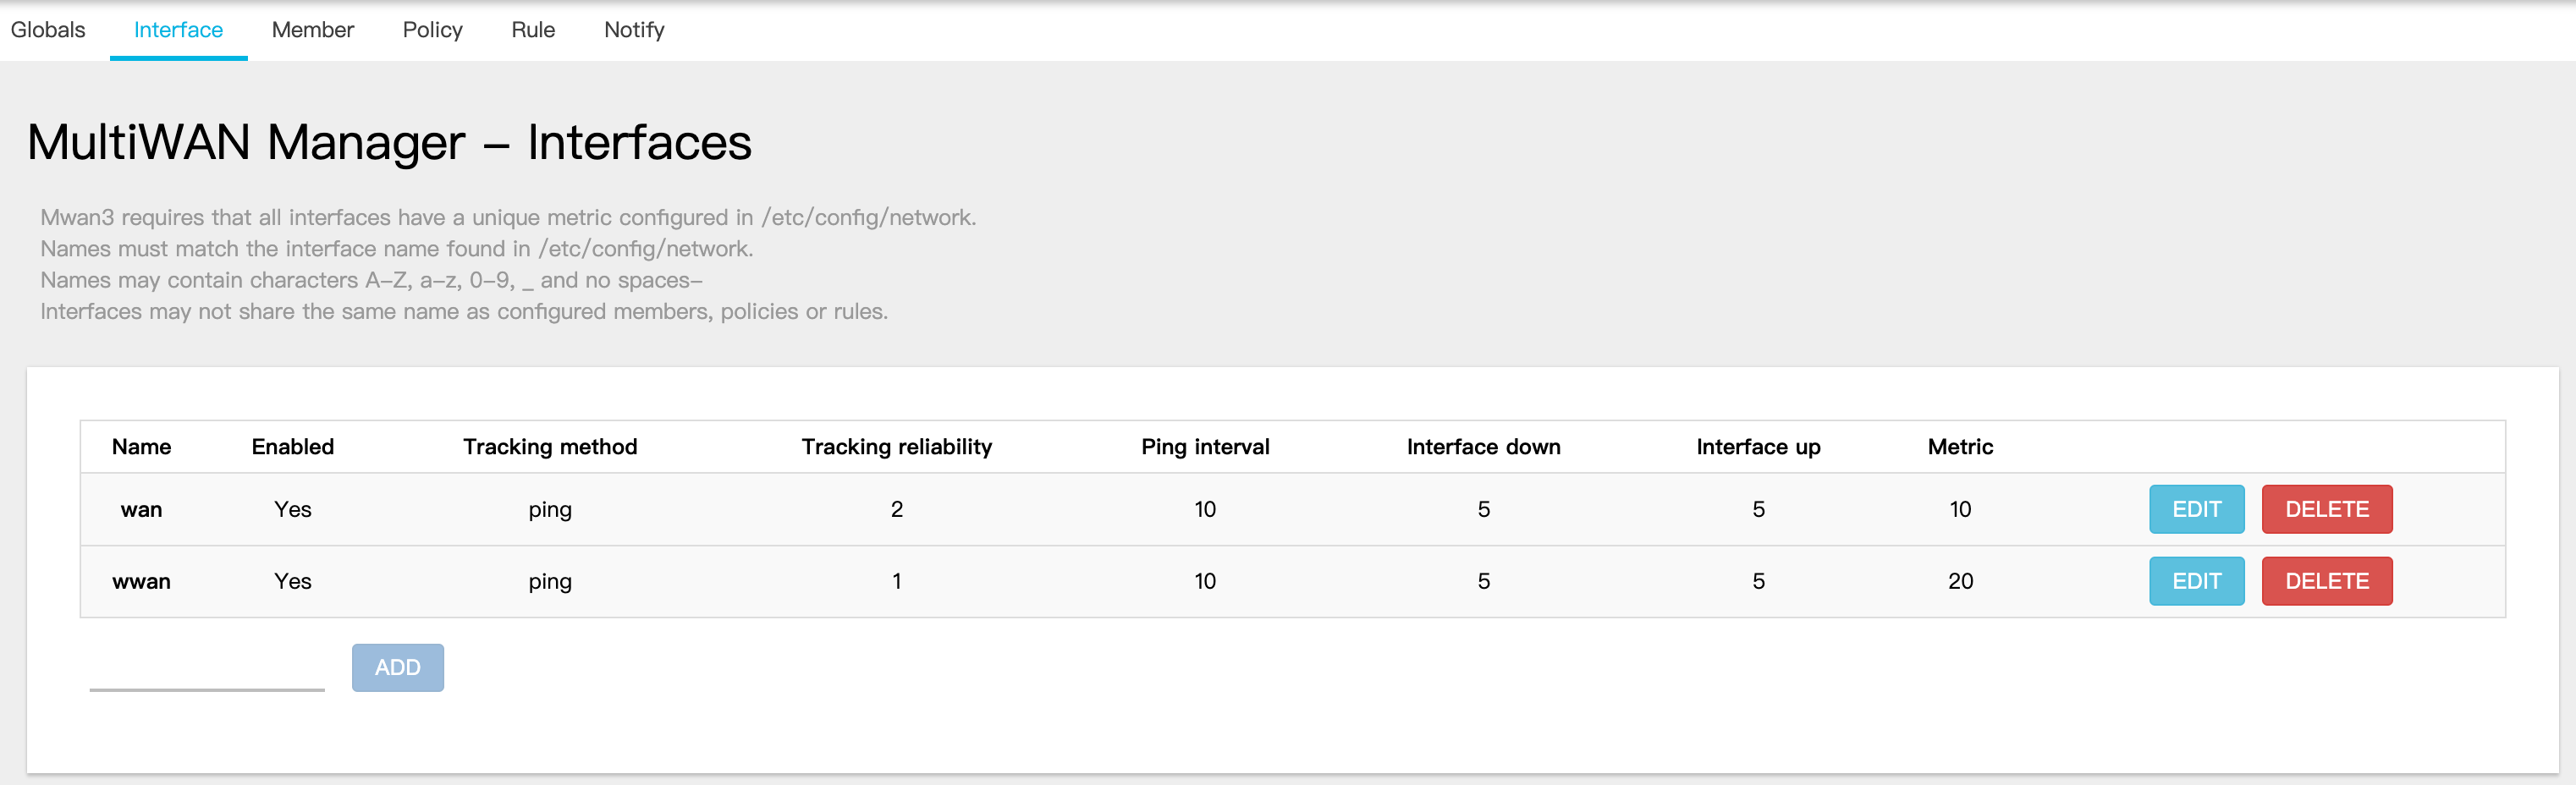
Interface
创建两个 interface,跟你的 Network Interfaces 里名称一样,类似如下:
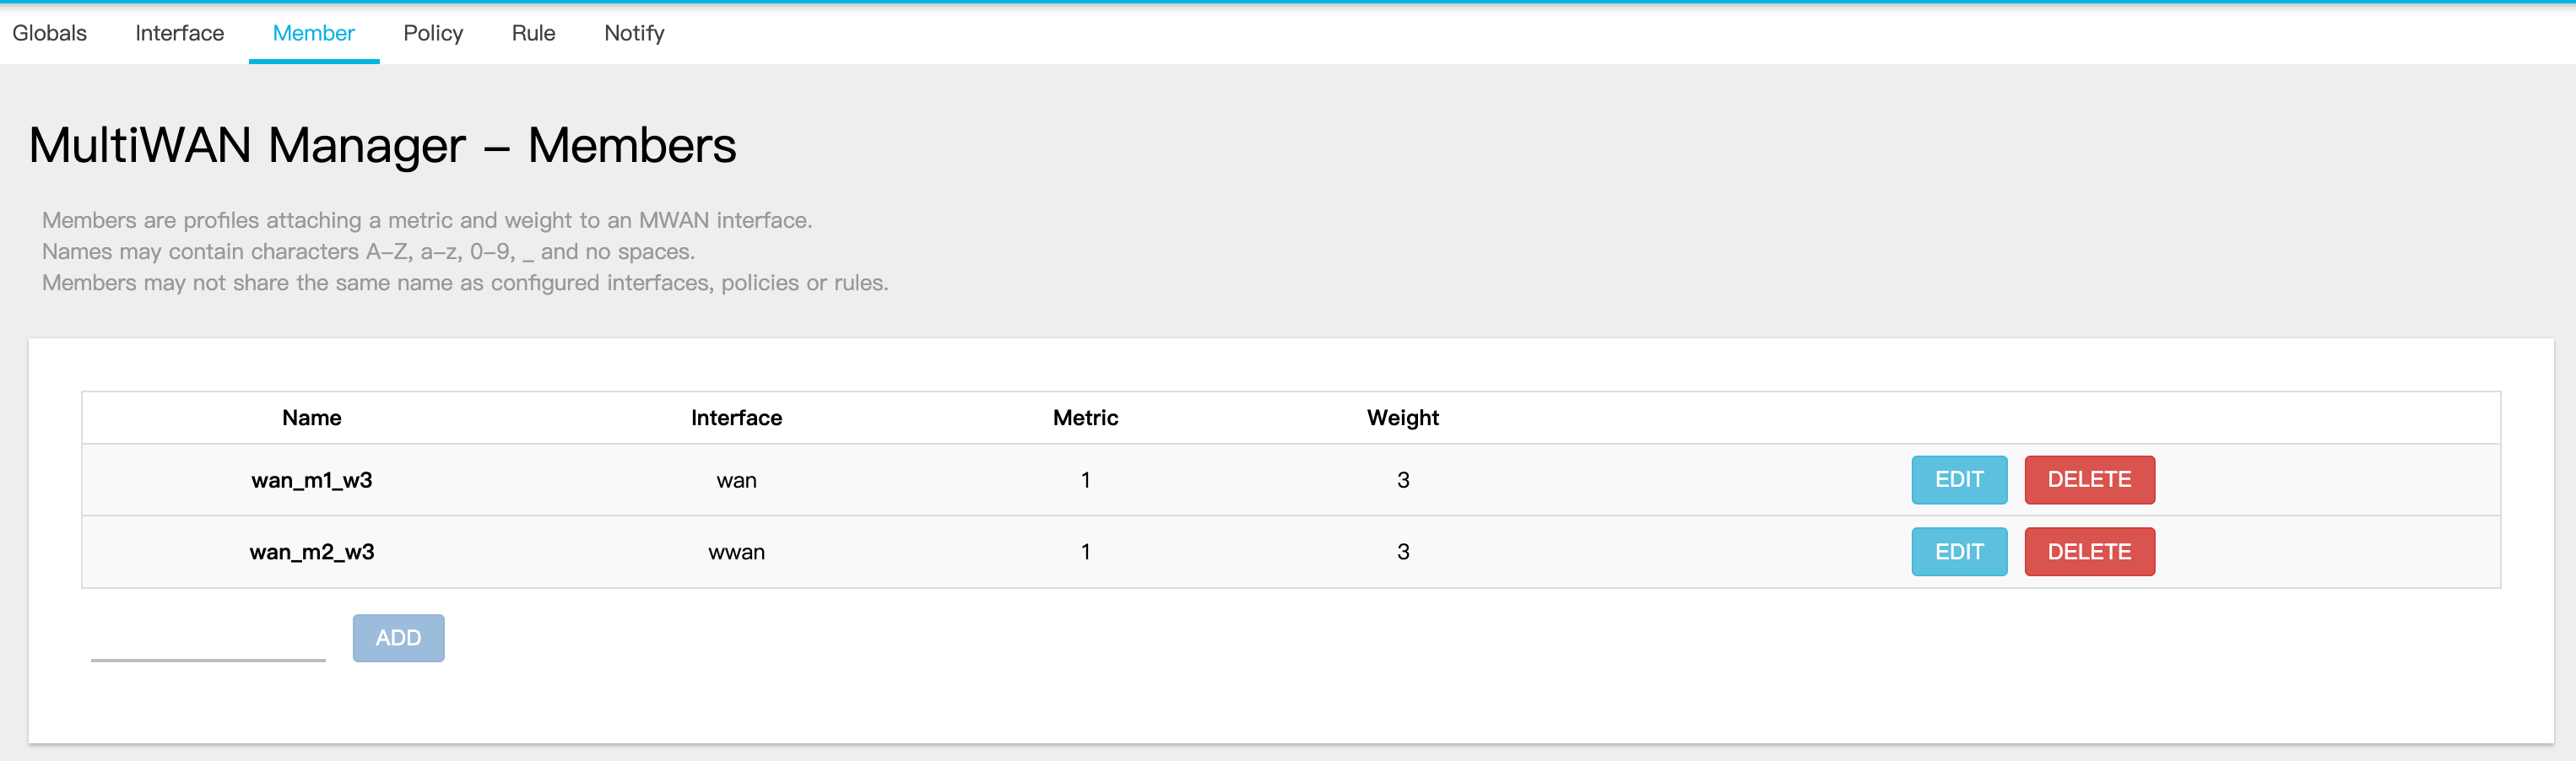
Member
新建两个 Member,保持 Metric 相等:
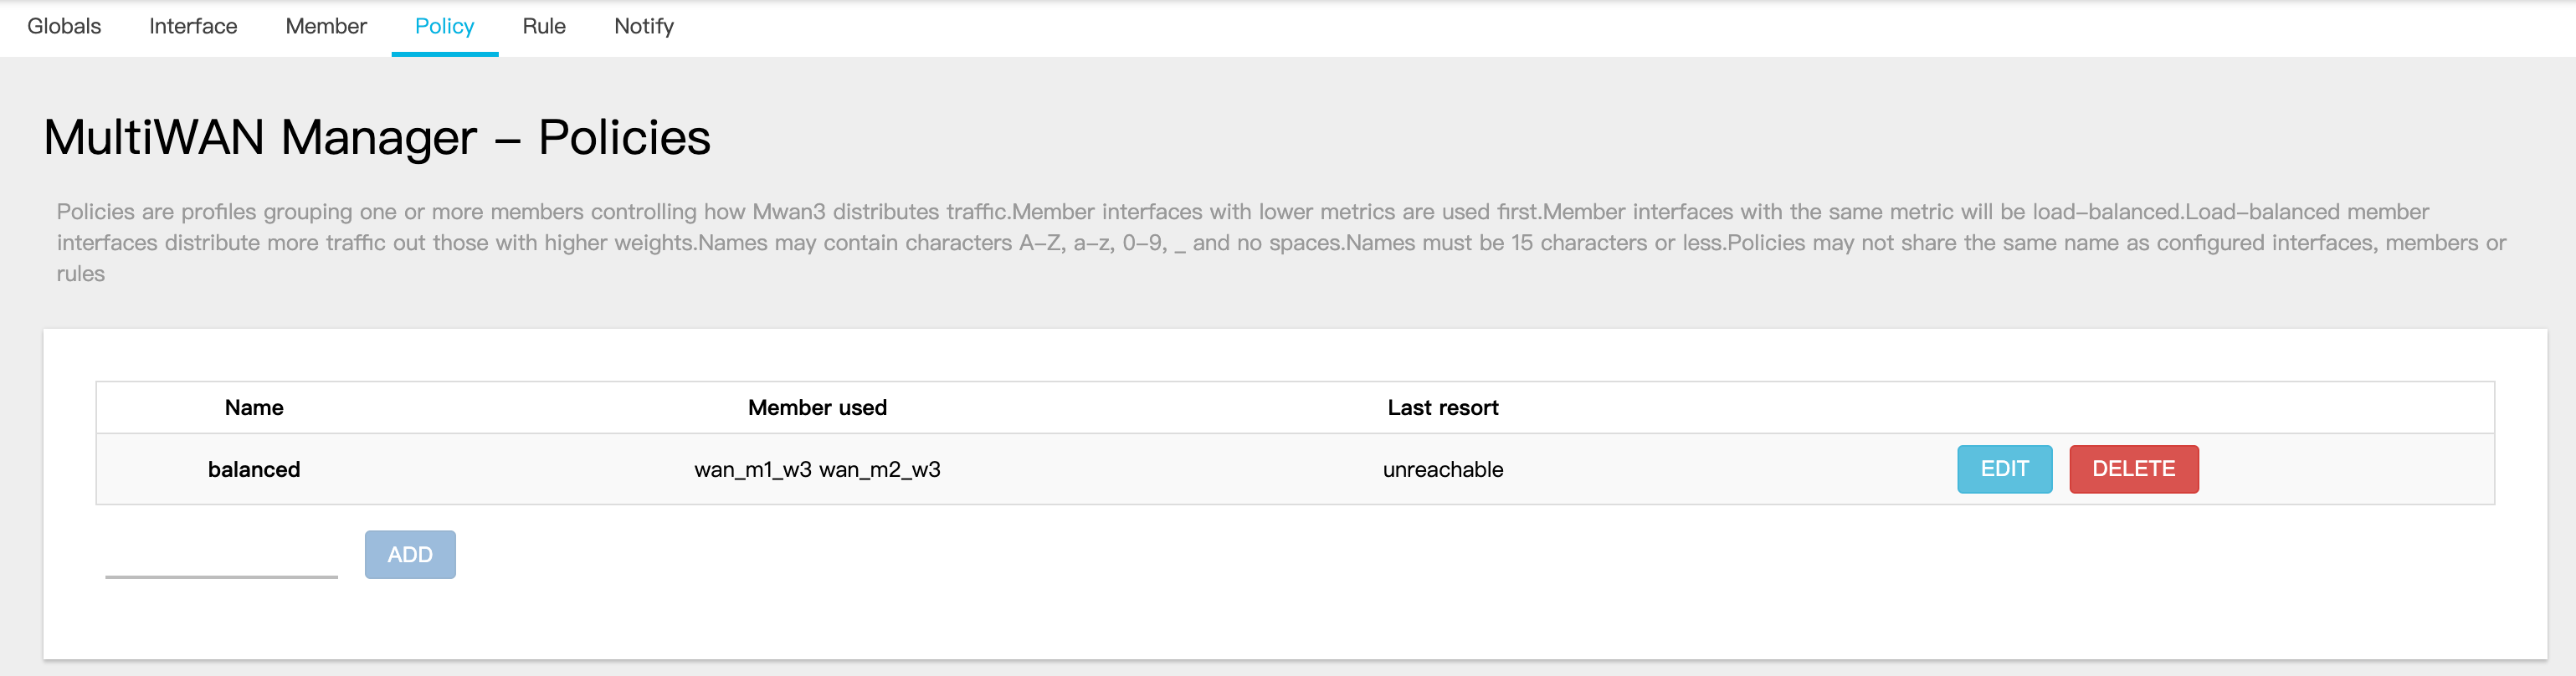
Policy
把两个 Member 选中
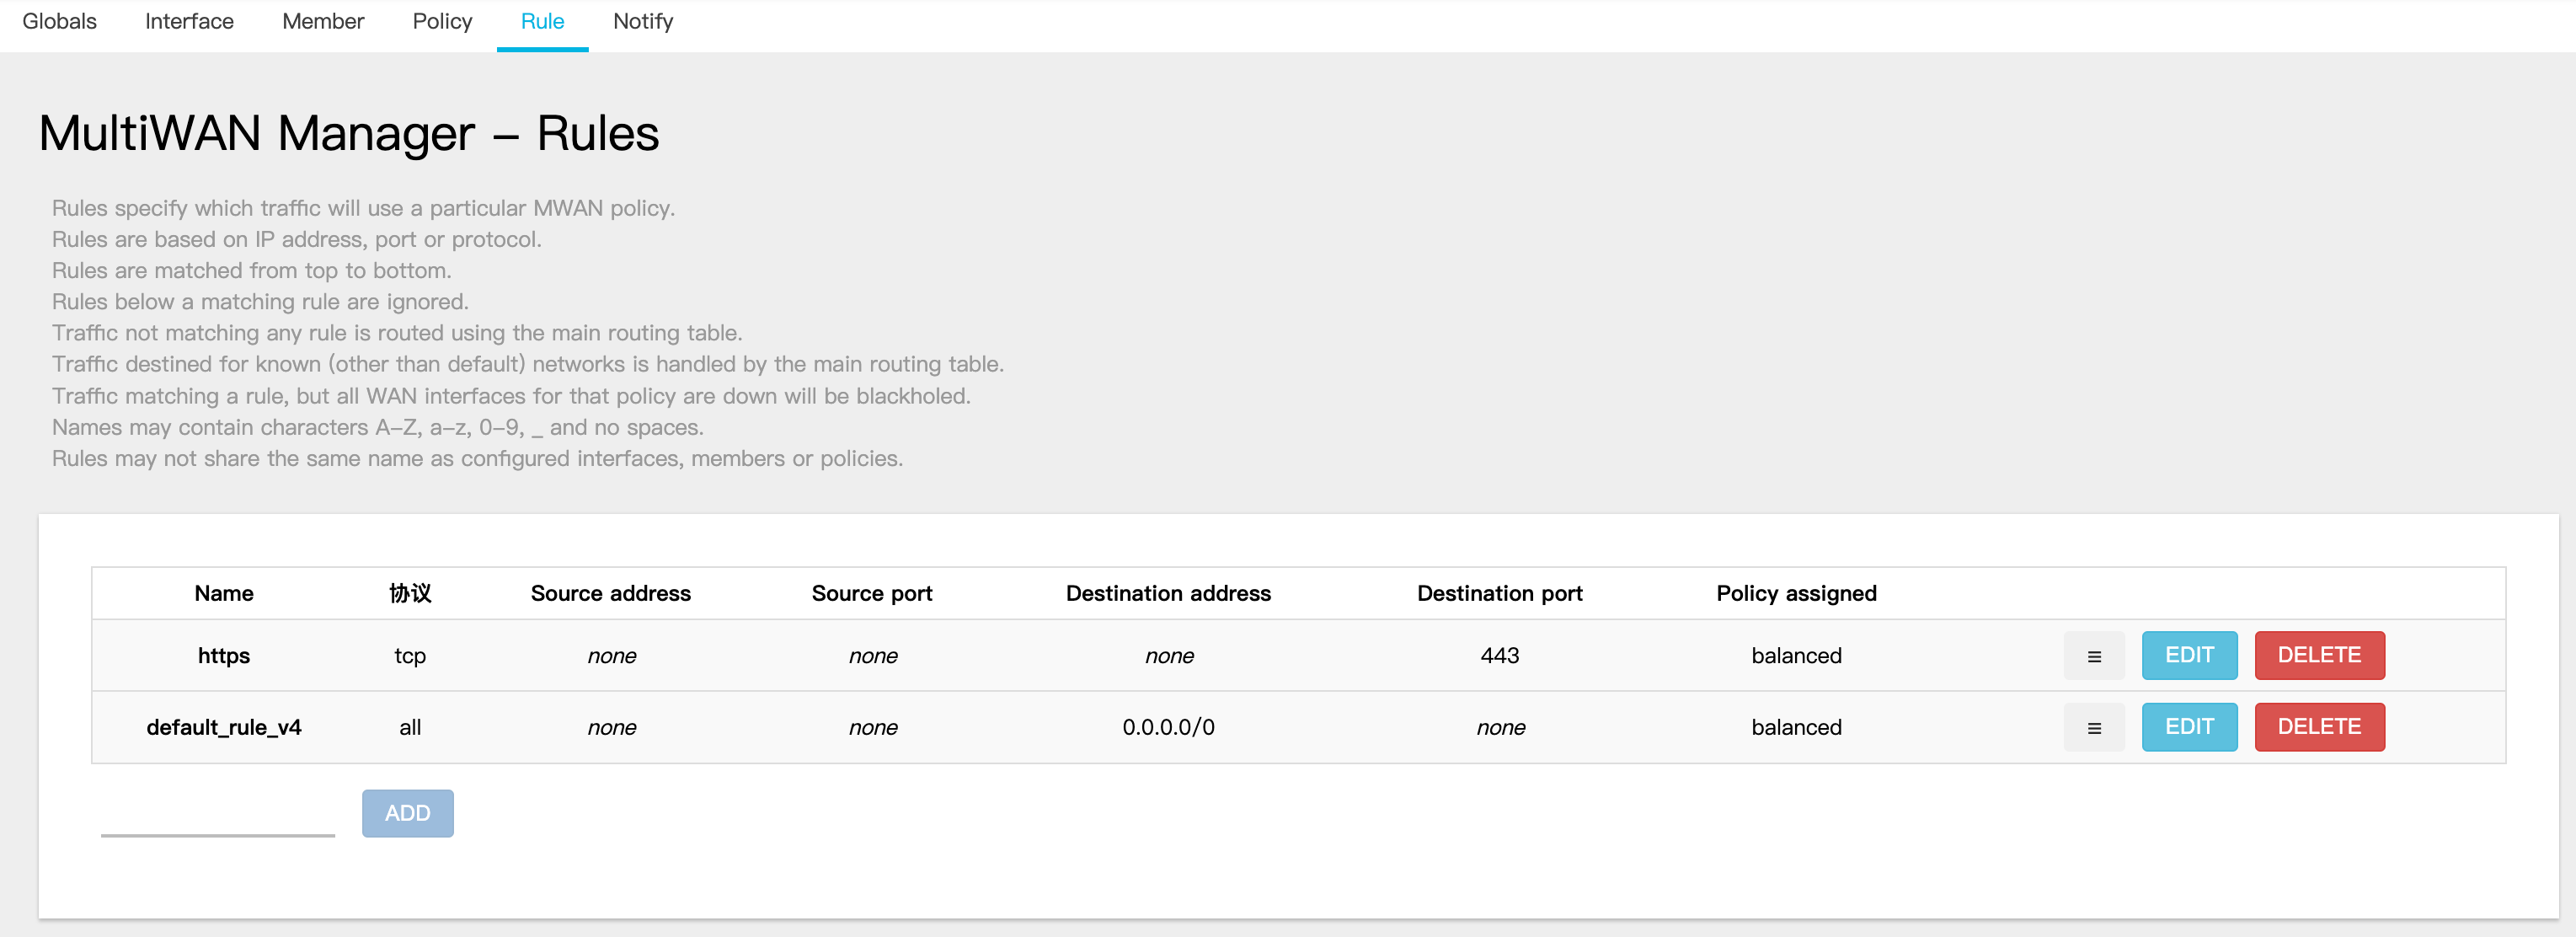
Rule
保留两个,https 一定要保留,因为不能随便切换线路。
总结
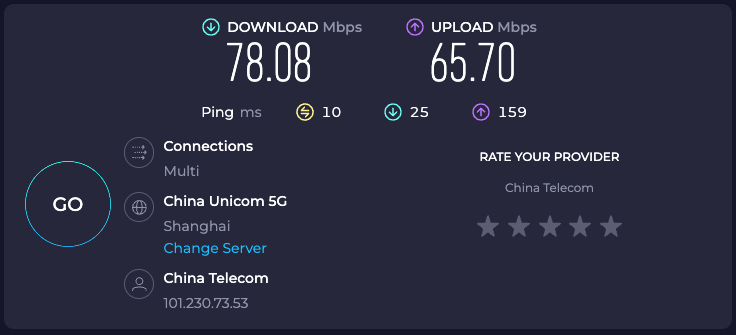
这样的话,通过两个出口,两个连接,就可以实现带宽叠加,达到更高的下载速度。
单出口
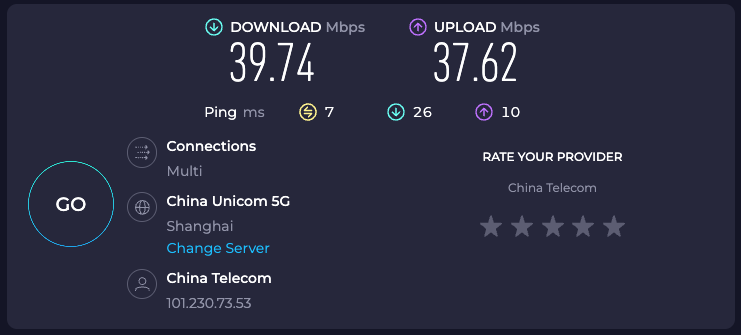
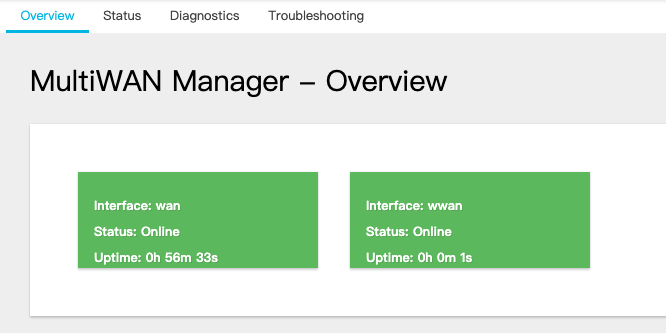
双出口